Download the Simmons Drums 2 App

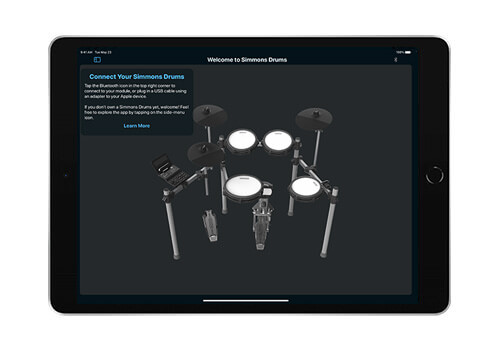
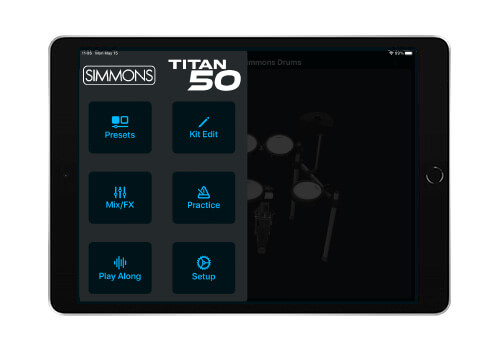
Main Screen
You may connect the app to your drum module using either Bluetooth MIDI (if supported on your module) or a USB connection.
Bluetooth MIDI
To use the app over Bluetooth, press the Bluetooth icon in the top right corner of the app. A window will pop up with a list of Bluetooth MIDI devices to connect to. Select your Simmons kit. The status should display “Connected.”
USB
To connect your device, use a USB cable. If your device has a USB-C port, use a USB-C to USB-B cable. For devices with a Lightning port, use a Lightning to USB adapter and a USB cable. After connecting, the window will show “Connected!” To access other app pages, tap the button in the top left corner to open the menu.
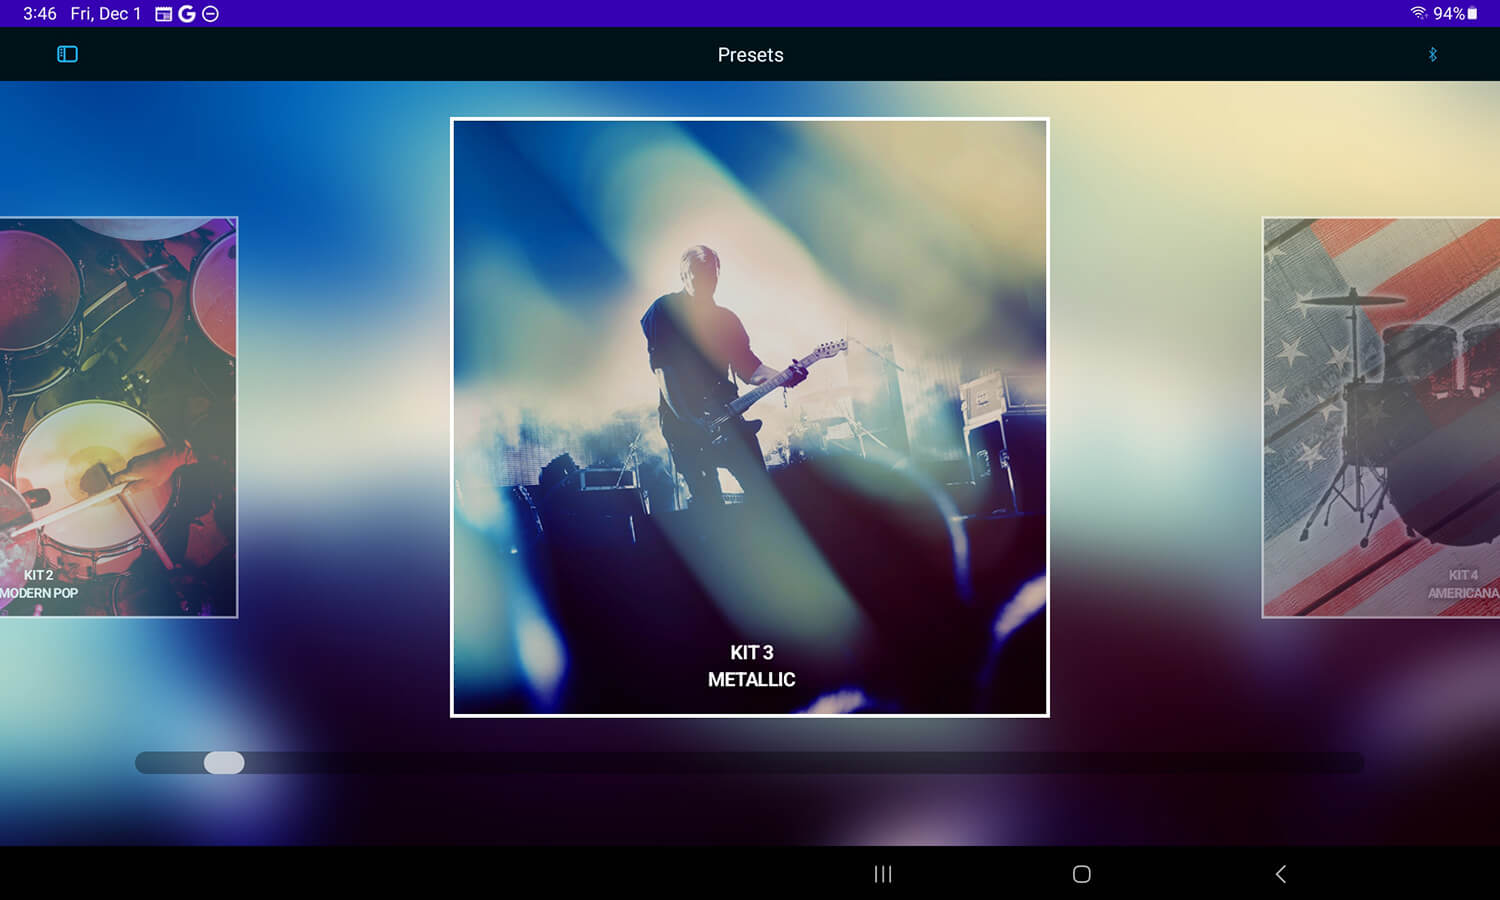
Presets
The Presets screen gives you a quick way to scroll through kits. Scroll one by one, or use the scroll bar to jump to the beginning or end of the kit list.
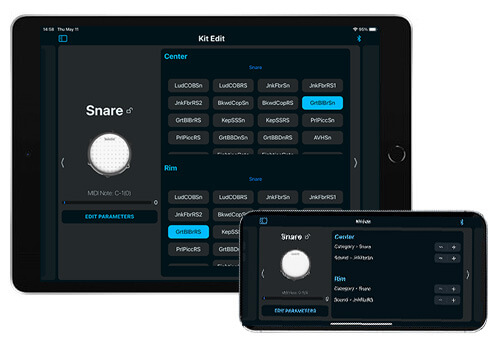
Kit Edit
This screen allows you to change the sound of a playing surface. Select a playing surface by scrolling through the available options or hit a surface with your drumstick.
You can change the sound category (Snare, Toms, Hi-Hat…) and the specific sound. Many pads have more than one zone.
Note: A spinning icon next to the Bluetooth symbol indicates that your device is still processing the MIDI output from the drum kit.
Note: The toms that come with the Titan 50 are single zone. You can purchase a dual-zone pad to access more zones or use a Y-cable to split the tom cable to two single-zone pads.
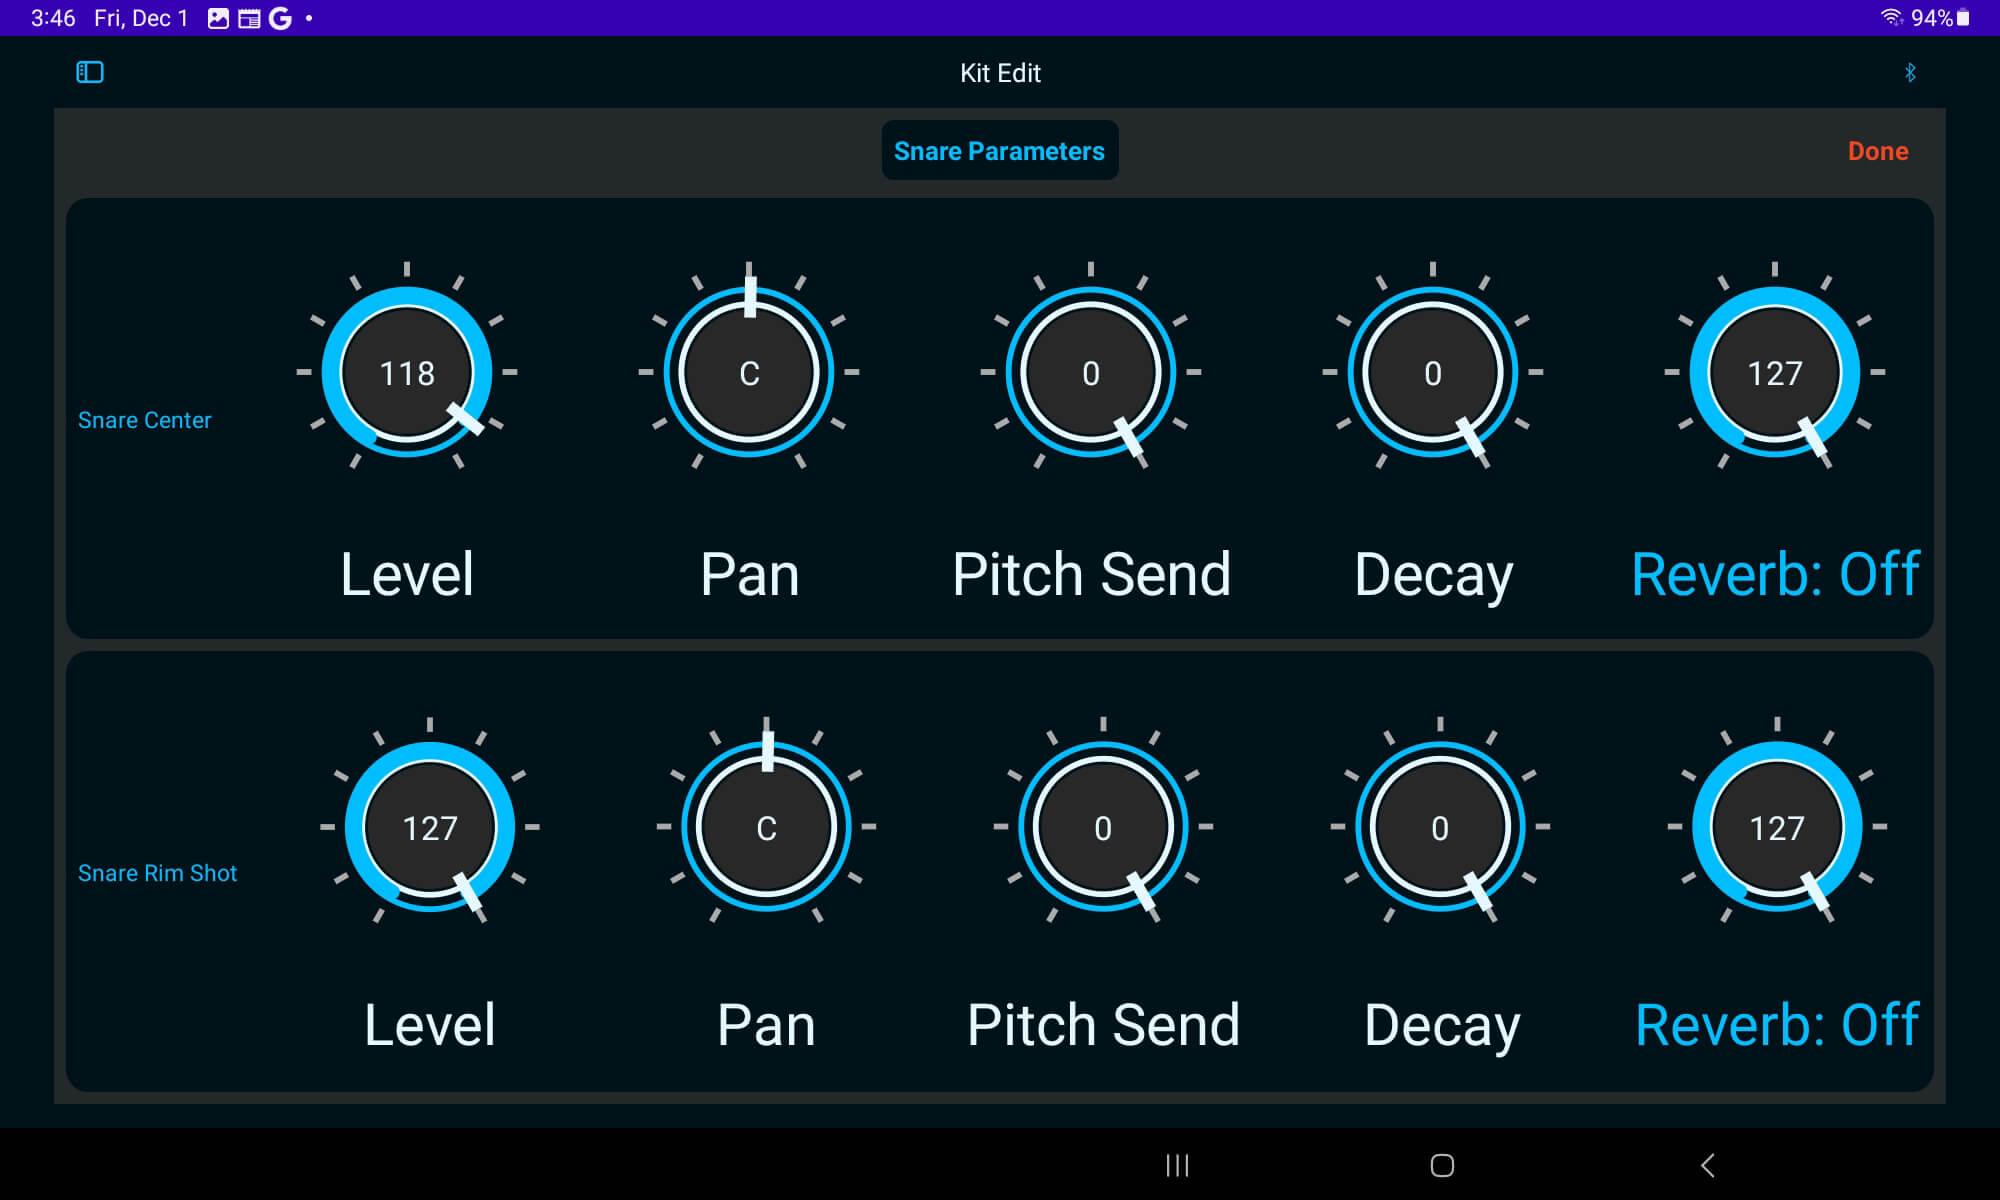
To access more sound parameters, press the “Edit Parameters” button. This gives you a few more options:
Level: Changes the volume of the selected sound
Pan: Changes the stereo balance of the sound from left to right
Pitch: Change the pitch of the sound. This can make a snare drum sound deeper or a cymbal sound larger
Decay: The length of time that the drum sustains. Turning down the decay is like adding gaffer tape to a drum to keep it from ringing.
Reverb: The amount of reverb send that drum has. To hear the reverb effect, you may need to turn on the reverb in the Mix/FX page (next section)
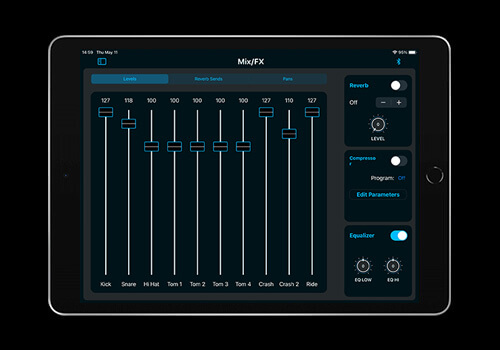
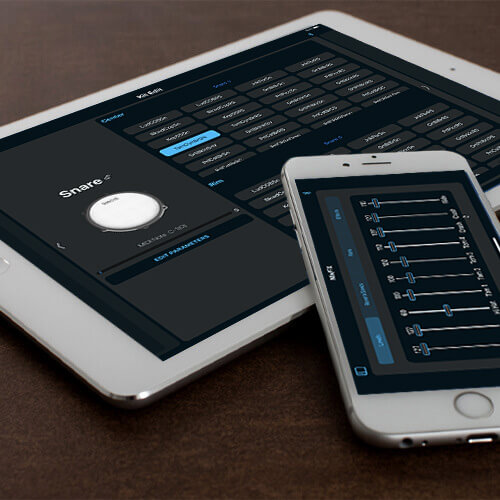
Mix / FX
This view shows the digital mixer built into your drum module.
You can turn individual drums up and down with faders, and change pan and effects.
Level: Use the fader to change the volume of a drum up or down
Reverb Sends: This controls how much of the signal is sent to the reverb processor
Pan: Changes the stereo placement of the sound from left to right
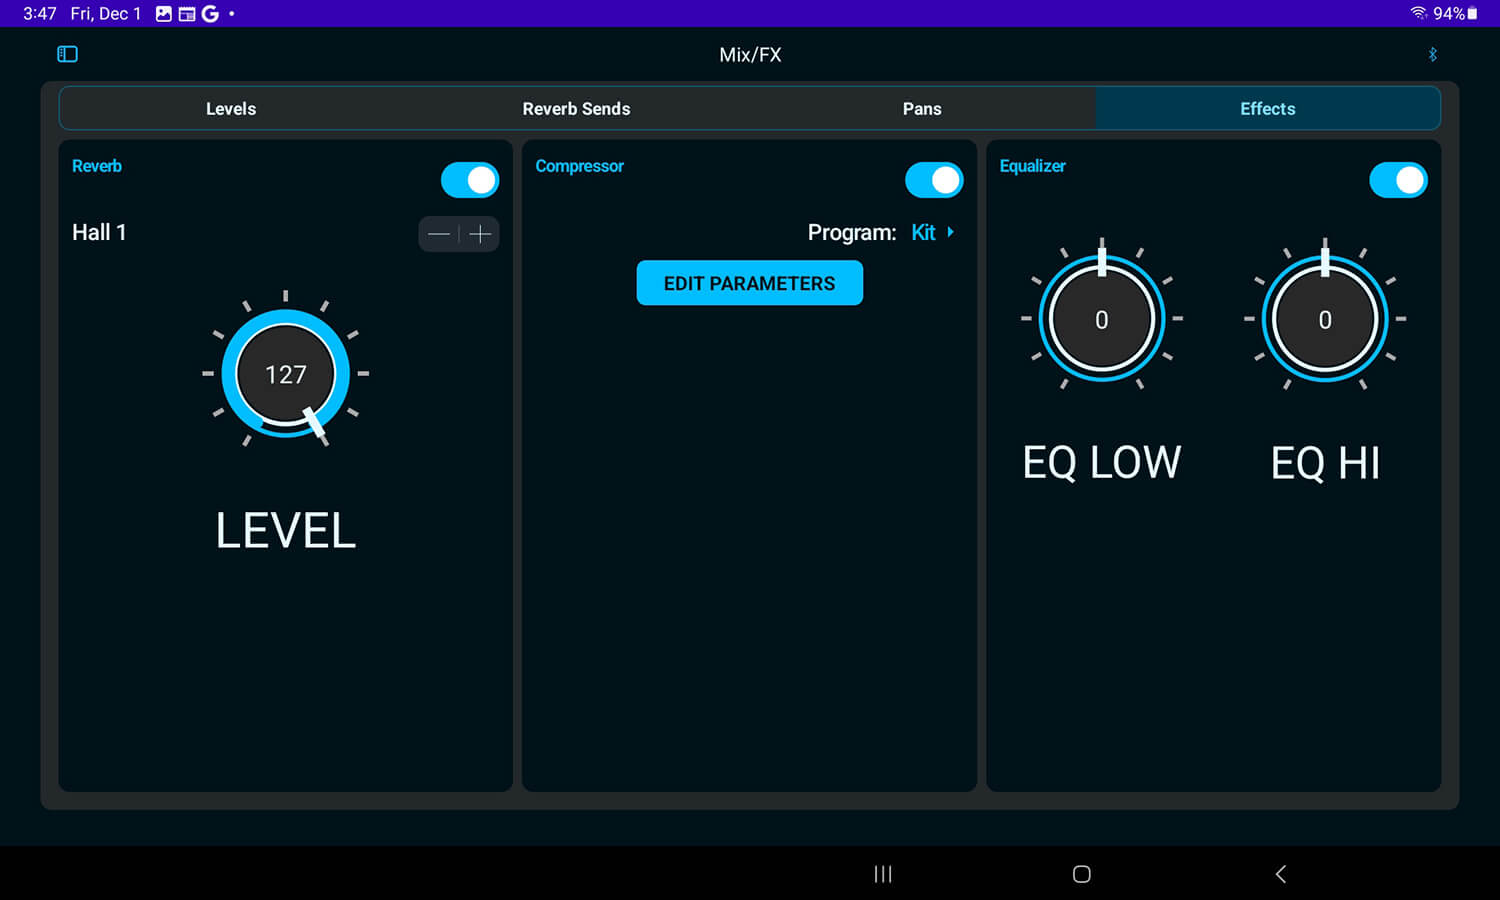
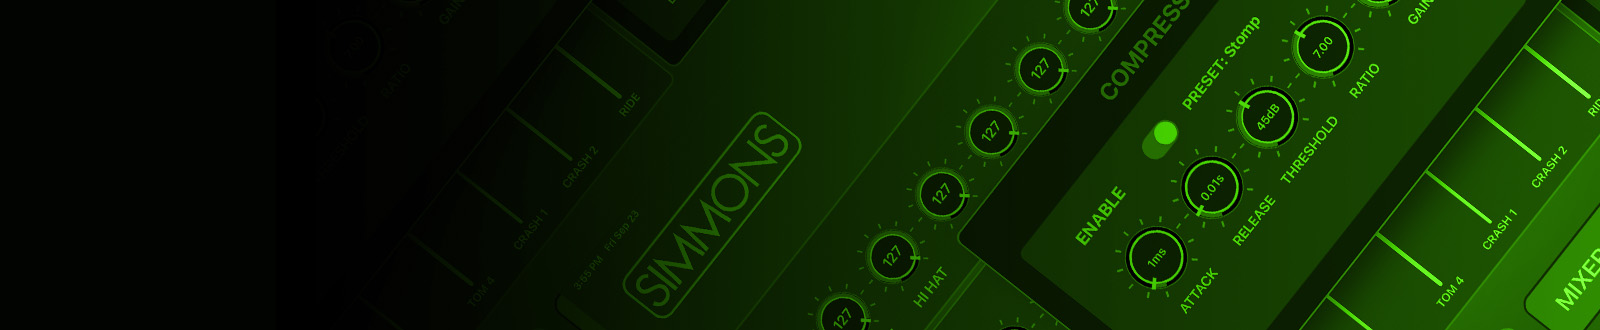
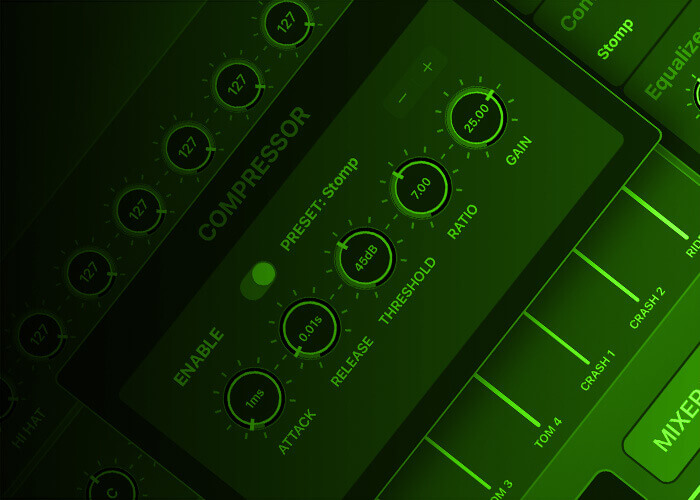
Effects
The effects section changes the effects processors. These controls are global for that kit, for example you can’t change the EQ differently for each drum.
Reverb Program: Choose one of the reverb programs like Hall 1 or Plate, or disable the reverb by switching it to Off.
Reverb Level: This is the overall level of the reverb. To hear reverb on a drum, make sure the Send is turned up for that drum, then also turn up the Level of the reverb.
Compressor Program: There are several preset programs for the compressor like Grind and Stomp. “Kit” is a special program which recalls the compression settings saved with the kit (if any.) Setting the program to Off disables the compressor.
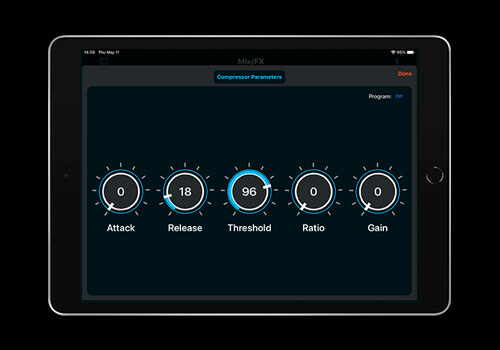
Press the Edit button in the compressor window to access more parameters:
Compressor Enable: Turn the effect on or off
Compressor Attack: Changes the amount of time before the compressor effect fades in
Compressor Release: Changes the amount of time before the compressor effect fades out
Compressor Threshold: This is the level that the compressor begins to take effect.
Compressor Ratio: This is how much the compressor turns down the level once the threshold is reached. The Threshold and Ratio of the compressor together control how intense the effect is.
Compressor Gain: Heavy use of the compressor will make the kit softer. This makeup gain control allows you to turn the volume back up. Be careful with this as the level can be turned up so high that the output distorts.
Equalizer Hi and Low: This is a shelving EQ to add or subtract low (bass) or high (treble) frequencies from the sound.
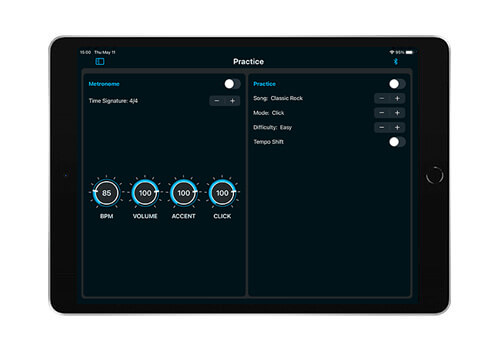
Practice
There are two sections of the Practice page. One controls the metronome, and the other controls the Practice tool in the Titan module. Practice is not supported on all modules.
Metronome
Time Signature: There are several time signatures in the module, this allows you to select patterns like 6/8 and 5/4
BPM: This changes the Tempo of the metronome and Practice mode
Volume: The level of the metronome
Accent: The level of the metronome accent. For example, the first click in a 4/4 pattern
Click: The level of the unaccented metronome click. In the example above, the other three beats in the measure.
Practice
Play: Starts or stops the Practice mode song
Song: Choose one of the songs in the module to play along
Mode: There are several practice modes, refer to the owner’s manual for more information
Difficulty: This changes the tolerance for how precisely you need to play for a high accuracy score.
Tempo Shift: This varies the song tempo during playback, see the manual for more information
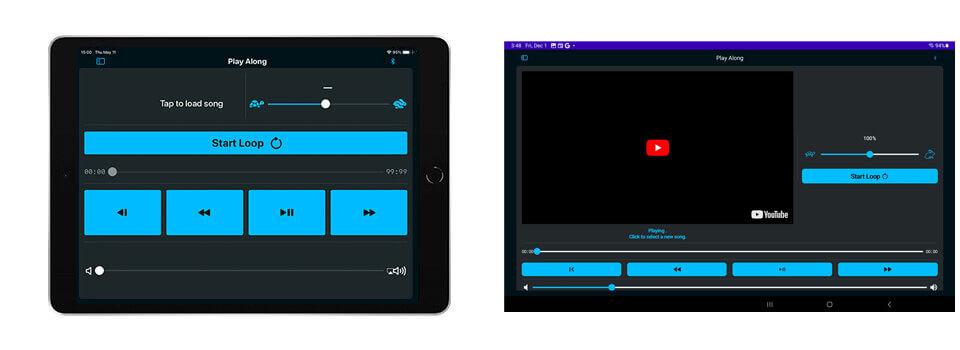
Play Along
Play Along allows you to practice with music. On iOS, you can choose from your device’s Local Files or your Apple Music library. On Android, you can choose from your device’s Local Files or YouTube. You may adjust the audio speed and choose to loop specific sections of the song.

Setup
Setup gives you a way to change the trigger settings in the drum module. You may adjust drum sensitivity on this page. Setup is not supported on all modules.
The settings in Setup are the same as in the drum module interface, but also displays the hit velocity meter that ranges from 1 to 127.
Curve: Tapping the icon in the top right corner allows you to choose between several curves that effect the feel of the drum pads
Retrig (Retrigger): How quickly you can play on the pad. If you are missing triggers when playing quickly, turn retrigger down.
Sens (Sensitivity): This is the gain of the pad. If you feel like you need to hit the pad too hard to get a sound, turn this control up.
Thresh (Threshold): How softly you can play the pad before it ignores the hit
X-talk (Crosstalk): If you hit the crash cymbal, it might vibrate the tom pad next to it. This control keeps the tom from triggering when that happens. Turn up the crosstalk if you have problems like that.
Local MIDI Control: If recording drums into a DAW, you might hear drum sounds triggered twice. If that happens, you can switch Local Control Off to prevent the problem. See the owner’s manual for more information.
Save Functions: Allows you to save presets and global settings to your Simmons module or the device the Simmons App 2 is on.
Download the Simmons Drums 2 App